|
|
Guide on creating an Icon
Creating an Icon : 10 steps

<previous
| next> |
Step
1: A special cloth is put onto the carefully selected
and prepared wooden plate, and then |
Step
2: Several strata of special preparation is lain down.
The mixture usually consists of Zinc for withening, carbon
shalk and glue.
|
|
Step 3:Sketch is being copied
onto the board. |
|
Step 4: Around the place of the
Saint, red color (usually natural Crayon) is set around, and
the glue for the golden leaves. |
|
Step 5: One by one, golden leaves
are set on the glue and then carefully polished to provide
compact and smooth surface. |
|
Step 6: The wooden plate is covered
with gold, all except the place reserved for the Saint. |
|
Step 7: The weardrobe is being
painted first, just in general. |
|
Step 8: After the weardrobe,
a special basic coulour is put onto hands and parts of the
face. Depending on the painting school, the colour could be
brown, green or red.
|
|
Step 9: The face is painted with
the light colour, the hair and details on the weardrobe are
being finalised. |
|
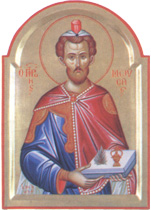
Step 10: The end: the brightest
accent is being painted over, and on the edges, and the name
of the Saint is being written. Before the icon is officially
accepted in the church, it must be blessed, and usually left
for some time after to stand in the church.
|
|
|